The Ultimate Guide to Fixing Stick Drift: Diagnosing, Repairing, and Preventing Controller Failure
Every serious gamer has experienced the frustration of “ghost movement”—that subtle, phantom input that causes your character to slowly walk off a cliff, your camera to pan uncontrollably, or your reticle to drift away just as you line up a critical shot.
This is the phenomenon known as stick drift. It is a widespread issue that plagues all major gaming platforms and can single-handedly ruin the precision and enjoyment of your favorite titles.
Stick drift turns competitive play into an exercise in frustration, completely destroying your control and leading to the unnecessary purchase of a new wireless controller.
This guide will serve as your comprehensive resource, breaking down the challenge of analog stick drift into three actionable phases: performing an accurate controller diagnosis, applying immediate low-effort fixes to solve the problem, and implementing long-term prevention strategies to ensure your expensive gaming gear remains reliable.
This information will help you effectively fix stick drift and prevent future controller failure.
I. What Exactly is Stick Drift and Why Does it Happen? (The Root Cause Analysis)
A. The Definition: What Stick Drift Looks Like
Stick drift is essentially a false input signal generated by a game controller when the analog stick is physically at rest in the center position. Functionally, it appears as a constant, unwanted input direction. This behavior directly relates to the concept of the “dead zone,” which is a small area around the center of the joystick’s movement where no input is registered. When stick drift occurs, the resting position of the joystick falls outside this programmed dead zone, creating perpetual ghost inputs that the system recognizes as player action.
B. The Two Primary Causes of Controller Drift
Understanding the cause is the first step toward effective controller repair. Stick drift is generally attributed to one of two distinct problems:
- Mechanical Wear and Tear (Physical): The most common cause is the gradual intrusion of foreign material. Over time, particles like dust, fine debris, hair, and pet dander inevitably work their way beneath the plastic dome and into the joystick assembly. These particles create friction or interfere with the smooth motion of the internal parts. Furthermore, the constant rubbing of the joystick shaft against the internal plastic housing, often called the “bowl,” leads to wear and abrasion, which changes the mechanical zero position of the stick.
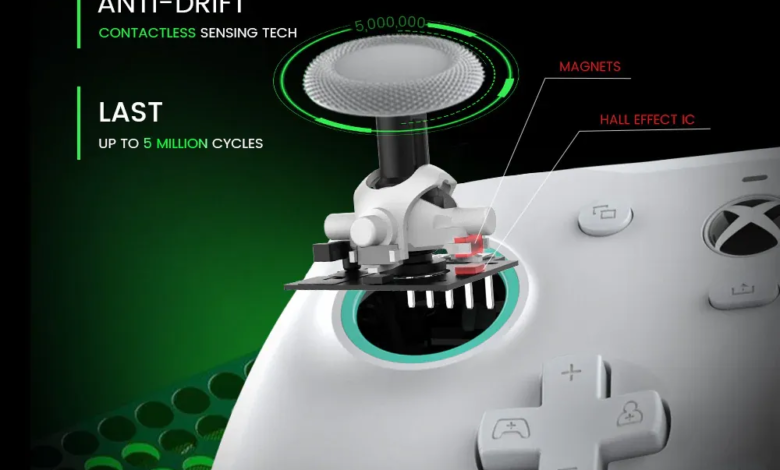
- Electronic Failure (Potentiometer Breakdown): The core of analog stick technology lies in small, electromechanical components called potentiometers (variable resistors). There are two potentiometers for each stick one for the X axis and one for the Y axis. When you move the stick, a slider inside the potentiometer changes the electrical resistance, signaling the magnitude and direction of the input to the console. Continuous use causes these internal resistance tracks to wear down or oxidize. This deterioration leads to unstable resistance values, meaning the potentiometers send slightly erratic or fluctuating signals even when the stick is still, causing the system to register ghost inputs.
C. Which Controllers Are Most Susceptible? (Console/Model Breakdown)
While all controllers use a similar design and are susceptible to mechanical wear, some models are statistically more prone to early electronic failure. The small, integrated design of the Nintendo Switch Joy-Cons has led to widely reported, persistent drift issues. Similarly, the advanced features and complex mechanics in high-end models like the PS5 DualSense and the Xbox Elite controllers can sometimes introduce vulnerabilities that manifest as drift or other tracking errors. For this reason, search terms like stick drift causes and why does stick drift
happen remain consistently popular among gamers seeking answers.
See also: Strengthening Digital Growth with Advanced Marketing Techniques
II. Step 1: Diagnosing Stick Drift Accurately (Before Buying a New Controller)
Accurate diagnosis is crucial. You need to know if the problem is minor debris (cleanable) or a major electronic fault (replaceable).
A. Testing Dead Zones and Ghost Inputs Manually
You can begin with your console or PC’s built-in tools. Most platforms include basic controller calibration menus that allow you to check input functionality.
- Console Method (PS5/Xbox): Accessing these menus typically shows a visual representation of the stick’s central position and dead zone. However, these tools often use pre-set filter tolerances that may mask minimal drift.
- PC Method (Windows): The “Set up USB game controllers” utility in Windows Control Panel is the standard way to test game controller inputs. It provides numerical readouts and a basic crosshair view. While useful, it does not show the raw, unfiltered data needed for a definitive controller diagnosis.
B. The Essential Online Tool: Using a Gamepad Tester for Precision
The built-in system tools are insufficient because they often smooth out minor input noise. To see the true, unfiltered signal being sent by your gamepad controller, you must use a dedicated, independent web application. This is the single most important step in verifying your controller failure.
The online tool is superior because it visualizes the exact, raw axis values (X and Y) transmitted via the Gamepad API. You can see the decimal value drift—for instance, if the value hovers at 0.003 when it should be 0.000—which confirms the electronic fault.
Actionable Advice: We highly recommend you Use a free, reliable stick drift tester tool to see your controller’s raw output data in real-time. This resource is essential for pinpointing the exact axis and magnitude of the problem before you invest in cleaning supplies or a new peripheral. By utilizing this advanced controller tester, you bypass the console’s internal filters and get an honest assessment of the hardware.
III. Step 2: Immediate Low-Effort Fixes (The 90% Solution)
If your stick drift tester results show minimal, intermittent movement, the problem is likely debris and can be fixed with these high-success, low-effort methods.
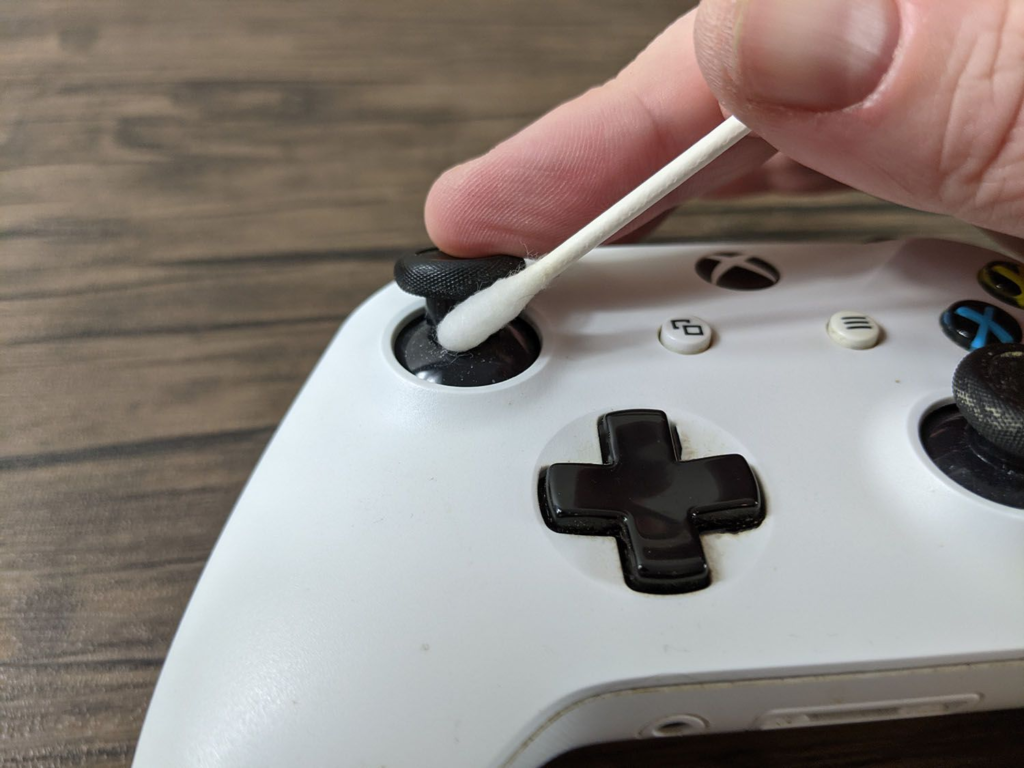
A. The External Cleaning Method (Compressed Air and Isopropyl Alcohol)
This technique addresses mechanical wear caused by external contamination.
- Gather Supplies: Secure a can of compressed air (or an electric blower) and 90%+ concentration isopropyl alcohol.
- The Technique: Lightly douse a micro-fiber cloth with the alcohol and carefully clean the entire perimeter of the analog stick.
- The Blast: Hold the stick to the side and use a burst of low-pressure compressed air, aiming directly into the exposed joystick socket. Rotate the stick 360 degrees, blowing into the socket from all angles to dislodge any internal debris. Repeat this process for the other stick.
B. Software Recalibration and Firmware Updates
Sometimes, minor drift can be a software error or a temporary calibration offset. Always ensure your game controller is running the latest firmware, as manufacturers frequently release updates specifically designed to refine internal calibration and adjust the dead zone tolerance. After a successful firmware update, re-run any available built-in console or PC controller calibration utility to reset the stick’s recognized center point.
C. The Quick “Click-and-Blow” Method (Switch and PS5 Specific)
For controllers like the DualSense or Joy-Cons, a simple, quick fix often works by exploiting the physical design:
- Depress and Hold: Press the joystick down (activating the R3 or L3 button) and hold it in place.
- Apply Air: While depressed, blow a quick, focused burst of compressed air directly into the base of the stick from the exposed side.
- Rotate and Release: Release the stick and rotate it fully three times in a circular motion. This sometimes successfully clears stubborn debris obstructing the potentiometers. This often provides a quick and simple way to fix stick drift easy.
IV. Step 3: Advanced Repairs and Permanent Solutions
If the easy fixes fail and the controller tester still shows high drift values, the issue is electronic, requiring more intensive solutions.
A. When You Need to Disassemble: Deep Cleaning and Potentiometer Reset
This is a high-risk section reserved for experienced DIYers, as disassembly can void warranties. The goal is to physically access the potentiometers.
- Preparation: Locate online guides for your specific game tester pad model (e.g., specific instructions for the dualshock tester or Xbox Series X controller).
- Access: Carefully open the controller shell (often requiring specialty tools) to reveal the internal circuit board.
- Deep Clean: Once exposed, you can directly clean the metal potentiometer casings with isopropyl alcohol or attempt a very gentle physical reset of the potentiometer tabs.
B. Hardware Replacement: The Potentiometer Swap
If a potentiometer is electronically fried, the only permanent controller repair is replacement.
- Identifying the Fault: Once the faulty component is identified (often the green or orange cubic modules at the base of the stick), it must be removed.
- Soldering Required: This step requires advanced soldering skills to desolder the old part and solder a new one onto the circuit board. Attempting this without proper tools and experience is highly discouraged as it will almost certainly render the gamepad controller tester permanently useless.
C. The Last Resort: Increasing the Dead Zone
If all else fails, you can use software to ignore the unwanted input, but this masks the drift; it does not fix it.
- In-Game Settings: Many competitive games like Apex Legends or Call of Duty allow you to manually increase the “dead zone” setting for the analog sticks.
- Effect: This forces the system to ignore small amounts of analog movement, stopping the ghost inputs. However, it also means your controller is less responsive, requiring you to push the stick farther before input is registered. This can subtly degrade your overall precision.
V. Preventing Stick Drift: Maintenance for Longevity
The best way to address stick drift is to prevent it from happening in the first place through good controller maintenance.
A. Best Practices for Controller Handling and Storage
Analog sticks are delicate instruments. Avoid aggressive “smashing” or rough handling of the sticks, especially during moments of high-intensity gaming, as this accelerates wear on the plastic components. Furthermore, never store your game controller in areas prone to high dust, excessive humidity, or liquid splashes, as these environments accelerate mechanical and electronic failure.
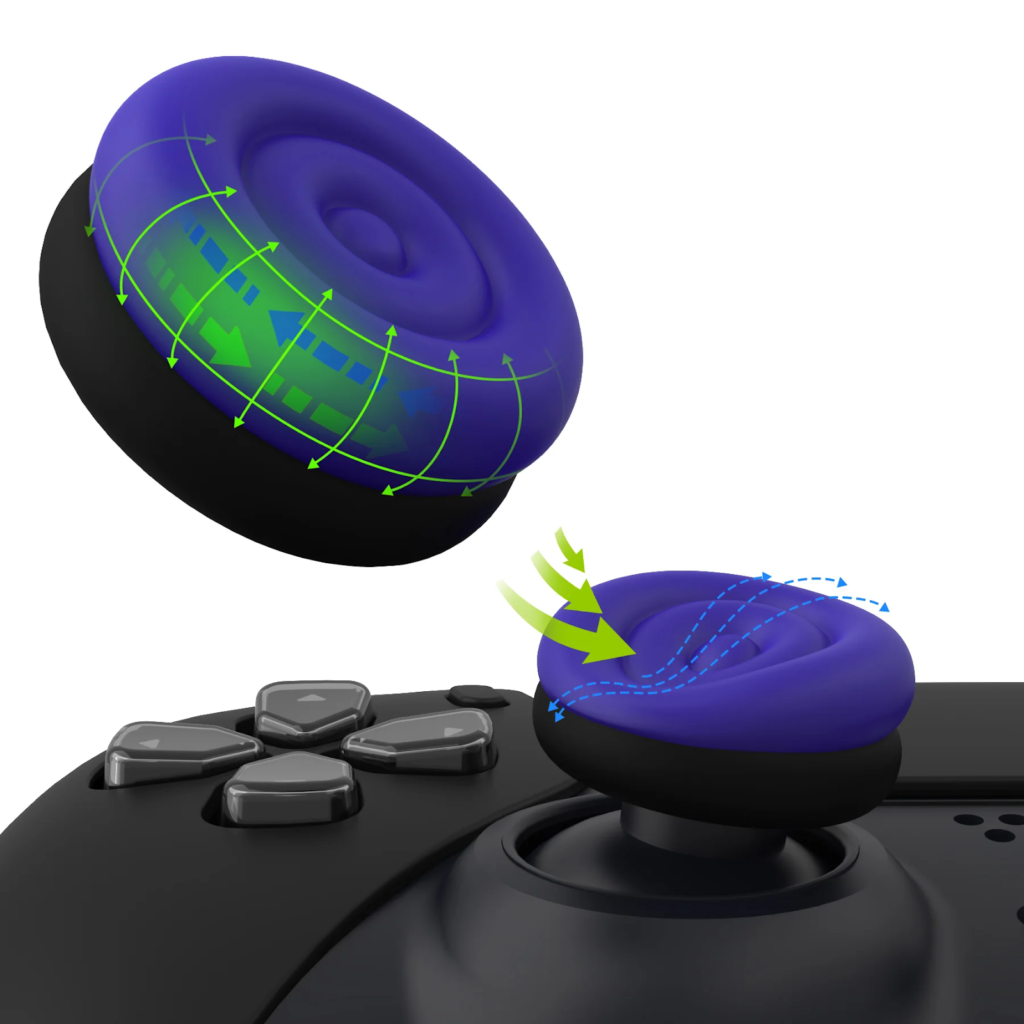
B. The Power of Protection: Controller Covers and Thumbstick Grips
Invest in simple, inexpensive accessories. A high-quality set of thumbstick grips or controller covers can act as a crucial physical barrier. They prevent the easy entry of dust and skin particles into the tight clearance around the base of the joystick shaft, which is the initial entry point for debris-related drift.
C. Routine Diagnostics: Make Controller Testing a Habit
A proactive approach is key to long-term controller longevity. We recommend making a quick gamepad tester check once a month, much like performing preventative maintenance on your car. Take 30 seconds to connect your peripheral to the online game controller test tool. If you notice the stick creeping even slightly before it becomes noticeable in-game, you can perform a quick external clean (Section III, Part A) immediately, addressing the issue before it escalates into irreversible electronic drift.